- Camping Tips
- Hiking Tips
- RV Camping
- Destinations
- Blog
- Gear Reviews
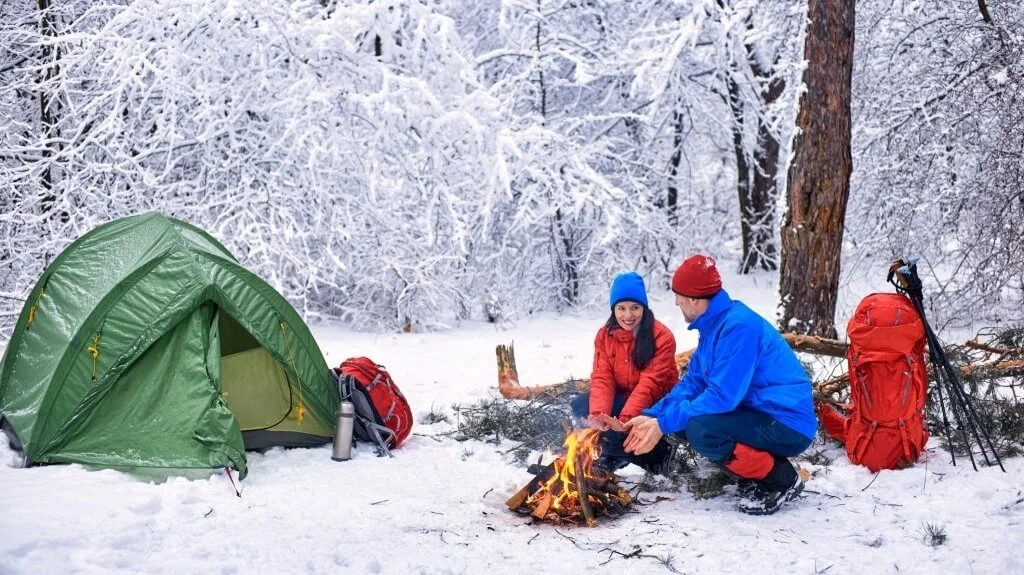
Tent camping in the snow can sound a little scary for the uninitiated but it has its perks. As the de facto off-peak season, the winter attracts fewer crowds at most site attractions and camping destinations. The fees are slightly reduced, and you might even be lucky to grab a hold of a free pass for some parks.
You get to enjoy the picturesque views of frozen lakes, snow-laden forestry, and so much more, unencumbered. Furthermore, there is no need to carry a cooler, and bugs are fewer during winter.
For the thrill-seekers, the stakes are much higher during winter camping than the more popular summer camping. Arguably, winter camping tends to be the ultimate experience for most campers besides the occasional boondocking.
Winter camping is dog-friendly and an opportune time to participate in winter sports and activities such as skiing, sledding, and snowboarding.
Lastly, it is the best opportunity, or shall we say excuse, to restock your camping gear.
However, the cold winter can be uncomfortable and sometimes deadly for the unprepared.
Temperatures can get to near-freezing resulting in discomfort or more severe cold-related complications. You might suffer injuries from prolonged cold exposure such as hypothermia, frostbite, frostnip, chilblain, and eye pain, etc.
Insulating your tent is a good approach to shielding yourself against cold-related hitches. Winterizing your tent is not only lifesaving but also inexpensive.
According to the second law of thermodynamics, heat will naturally flow from a hotter to a colder body. In our context, warmth from our bodies will dissipate to the colder environment and eventually out of the tent until an equilibrium is achieved.
Your body naturally loses heat in many ways including evaporation of sweat from your skin, respiration processes, convection, and radiation. Likewise, body heat can be lost through conduction by touching or sleeping on colder surfaces.
So, the reason you want to insulate your tent is to minimize the amount of heat transferred from you and the tent. We’ve put together below a few methods you can use to fully insulate your camping tent for the winter season.
Covering your tent from the outside or inside with insulative material does a great job of keeping the warmth in and the cold out. To achieve this, you want to line your tent’s canopy and walls with insulative or heat-reflective materials on the inside of the tent.
Feel free to use duct tape to firmly attach the materials to the tent.
Heat reflective materials such as thermal blankets, space blankets, reflective foam, and reflective foil are all good candidates for this purpose. They help bounce back any lost body heat instead of it getting dissipated through the walls of the tent.
Other options you might try include bubble wrap, cardboard, insulated paneling, or any other insulative material that won’t be a hassle to install. These materials work because they are terrible heat conductors and thus can’t transfer heat to the surroundings.
In addition, you can cover the outside of the tent using similar materials to form a solid insulating layer over the tent.
Another approach to insulating the canopy and sidewalls would be to use a small tent inside a bigger tent. Here, you want to replicate the functionality of four-season tents and double-walled tents where dead air is used as a form of insulation.
Dead air pockets offer decent R-values and are often used as insulation in buildings. Ideally, you would want the air pockets to be completely sealed off for maximum effectiveness. But that would be near-impossible to accomplish for camping tents.
With camping tents, you at least want to make sure you have no condensation issues and that the tents are weatherproof. Additionally, the tents should be close in size but not touching to avoid having too much volume of air circulating between the tents.
Given that you must carry two tents, this idea will be more practical for car camping trips than your backpacking ones.
Remember that tents are built mainly to protect against the elements so you will still need to use other methods to help improve insulation. A solid sleeping system is irreplaceable when it comes to staying insulated.
In addition, you risk damaging the floor of the bigger tent with the poles of your smaller tent so be sure to grab one with tough flooring.
Next, you want to protect yourself from the elements to prevent compromising your freshly installed insulation layer.
The goal here is to minimize the chances of rainwater, snow, and strong winds getting inside or damaging the tent. Ideally, your winter tent should have enough features to shield you from bad weather but it’s always advisable to double-check everything.
A full-coverage rainfly performs well at protecting your tent from snow and sleet while a waterproof one does an even better job. The rainfly should ideally have a high hydrostatic rating to ensure water doesn’t seep into the tent. Instead, the water should bead up and roll down to the ground.
Keep in mind that the resulting double-wall construction when you use a rainfly greatly helps prevent condensation build-up. Moreover, it creates a gap of dead air that can act as an extra layer of insulation.
Since most tents come with tightly integrated flysheets, a camping tarp can be used for extra protection against winds and sleet.
When camping in blustery conditions, a natural or manmade windbreak can be a good first line of defense. A windbreak will also come in handy when building a fire. So, always pitch your tent closer to natural windbreaks such as big shrubs, thick bushes, big rocks, trees, and hills whenever possible.
Alternatively, you can build a tarp or a snow wall windbreak using simple tools.
Use your trusty trowel or shovel to slowly build a snow wall around your tent to block the wind. Alternatively, hang a tarp on a line attached to two poles/stakes or trees to shield your outdoor shelter from gusts of wind.
The location of the campsite is equally as important in dealing with the elements. You want to pitch your tent away from wind-prone areas but not closed-off zones such that ventilation and air circulation would take a hit.
Stake down your shelter securely to prevent air leaks and avoid it being bowled over by gales. Pitch the tent with the door facing away from strong winds. Keep in mind that a freestanding tent would offer the best flexibility when adjusting the position of the tent.
If you anticipate snowfall or a heavy downpour, camping on higher grounds is often a much safer option. Moreover, you want to pitch your tent where it will easily catch sunlight in the morning. This helps evaporate any dew or frost and melts off any ice formed on the tent during the night.
At almost every budget point, there are plenty of materials you can use to insulate the tent flooring. Whichever material you get will further help protect the tent floor from getting damaged by sticks, protruding roots, and rough terrains.
Moreover, ground insulation helps prevent groundwater from seeping into the tent and in effect ensures the cold stays out of the tent.
A footprint or a groundsheet is a must-have option whether you go camping during summer or winter. It goes between the ground and the tent floor. A footprint helps prolong the life of your tent, reduces heat loss, and adds extra waterproofing.
Ideally, you want a footprint slightly smaller than the tent floor to prevent water from pooling underneath the tent. Manufacturers will often bundle up their tents with suitable footprints, but any custom-cut alternative will still suffice.
If you can’t find a suitable footprint, a ground tarp will do. However, you will still need the tarp to be slightly smaller than the base of the camping tent. You may cut the tarp to size or just fold the excess underneath the tent to make it more usable for other functions.
As for the material, you can never go wrong with a high-denier, waterproof-coated polyethylene footprint.
The next best alternatives for your ground insulation include floor blankets, foam tiles, carpets, area rugs, emergency blankets, reflective foam, or even dry leaves.
Floor blankets made of wool can be laid on the tent floor to add an extra layer of insulation. Keep in mind that wool blankets can be extremely heavy and bulky to move around. So, maybe consider getting blankets made of synthetic materials whenever weight is a concern.
Carpets and area rugs will go a long way in keeping the warmth inside the tent. Heated carpets could equally be useful at improving insulation and heat generation. But they will only be an option when camping in campgrounds with electric hookups.
Some campers swear by interlocking foam tiles, but they can be a tad bit bulky and heavy to haul. Then again, you can form colorful combinations with them to spruce up your tent’s interior décor.
Reflective foam works by reflecting your body heat to you and can be easily cut to fit any tent floor size. Emergency blankets work similarly and might also be used for tent flooring insulation.
A base layer of dead leaves is a good way to cap off your ground insulation. A nice pile of dead leaves is generally a good heat insulator but they mostly rely on the dead air space in between to limit heat transfer. Therefore, you can’t fully rely on just a layer of dry leaves only for ground insulation since they get flattened out over time or when you lay on them.
Instead, you can place piles of dead leaves near any openings in the tent to control drafts and offer some insulation.
An off-ground sleeping platform helps improve the effectiveness of your overall ground insulation. It could entail a camping cot, a sleeping pad, or a combination of both. While air mattresses might be more comfortable, they don’t offer adequate insulation against the cold.
A camping cot offers the closest experience to your home bed. It is comfortable and easy to get in and out of, making it even more ideal for people who suffer from joint and back pain issues. However, they come with one major caveat:
Camping cots are notorious for being drafty underneath the sleeping surface. So, you want to only stick with a very low-profile option or at least pair it with a sleeping pad for better insulation.
Speaking of which, sleeping pads add an extra insulation layer between your sleeping bag and the cold ground. They come in three main variants namely self-inflating pads, closed-cell foam pads, and manually inflated air pads.
Air pads are thinner but more insulated than your typical air mattresses or airbeds. On the other hand, self-inflating pads have valves and open-cell foam interiors that allow for quick installation and packing. Closed-cell foam pads are essentially just thin mats made of dense foam with tiny, closed air spaces in between.
Consider getting a well-insulated self-inflating pad or air pad for your winter camping needs. Most importantly, deliberate on the level of insulation (R-value) of a sleeping pad before making your final decision.
A higher R-value means the sleeping pad has more ability to insulate you from the cold ground. Further, different materials making up the pad influence its overall R-value. Winter sleeping bags will often have an R-value of approximately 4.0 units or higher.
Additionally, keep away from sleeping pads that are too thick as that would result in losing too much body heat to the air gaps.
Lastly, we vouch for using a full-length sleeping pad or even two of them to fully insulate against the cold ground. A self-inflating mat at the top and a closed-cell foam pad at the bottom works perfectly, especially at preventing punctures to your inflatable sleeping pad.

There are several tips and tricks you can implement to enhance your tent’s insulation and stay warm when winter camping. From solutions as simple as getting the right camping tent to complex options such as layered dressing and using heated rocks, mankind’s quest for survival never stops.
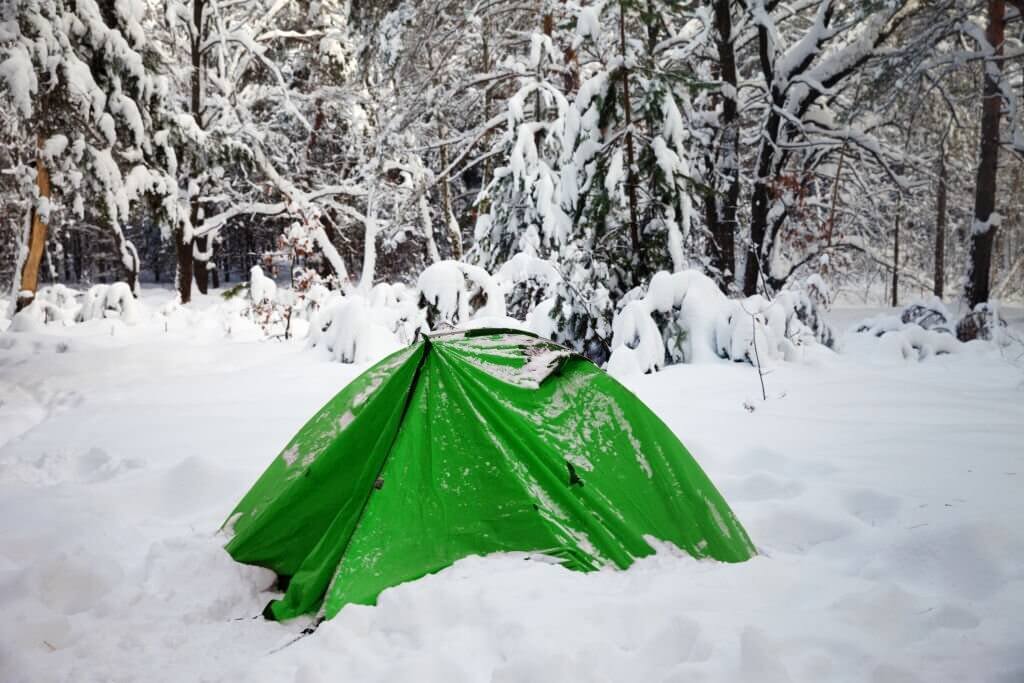
Always ensure that your outdoor shelter is already well-built to handle cold, snowy conditions and extreme weather. It should be appropriately sized, waterproofed, and comprise a strong frame at a bare minimum.
Keep in mind that having a well-insulated tent on the go always beats having to waterproof and insulate a non-winter-rated tent.
Four-season-rated tents are typically the safest option to go with for winter camping. They tend to have great ventilation, thick water-resistant fabrics, and are built with strong wind-responsive frames.
While you can opt for a three-season tent, the extra work and costs to make it winter-ready are just not worth it.
Winter tents have high hydrostatic ratings going north of 2000 millimeters for the various parts of the tent including the rainfly, flooring, and inner tent. Furthermore, the fabrics are often coated with waterproof treatments like polyurethane or silicone to help keep moisture out.
Moreover, these tents are engineered to shield you against the eventual snowfalls, heavy downpours, and strong winds. Speaking of which, four-season tents will come with various types of frames including those made of aluminum, steel, fiberglass, carbon fiber, or composite materials.
Tents with steel pole frames are normally sturdier, windproof, and slightly more affordable than other options. However, steel frames can be extremely heavy and are prone to corroding over time. Consider getting a winter tent with powder-coated steel pole frames to prevent or slow down the rusting problem.
Backpackers looking for lightweight options might want to consider four-season tents coming with aluminum or fiberglass pole frames.
Poles made of aluminum or its alloys are generally less corrosive, super lightweight, and flexible than steel. They bend a little but do not break against gusts of wind. However, they cost more than other alternatives.
You can expect to pay even higher if you go for notable brands such as DAC or Yunan.
Tent poles made of composite materials such as Easton Syclone poles offer incredible flexibility and resilience against gales. But they are rarer to find and costlier than aluminum options. On the other hand, fiberglass tent poles are relatively strong, more affordable, and rustproof.
However, you will need to handle fiberglass poles more carefully as they tend to shatter, splinter, and break under pressure. They may also split or crack at low temps, so they are not suitable for extreme winter conditions.
Regardless of the pole material, it’s always a good idea to bring along with you some extra poles and pole splints for in-the-field swaps and repairs. Besides the poles, you will need a tent with high denier ratings for tear-resistant performance throughout your camping trip.
In conclusion, your ideal winter tent should have a shape or design that allows snow to be shed off. Free-standing dome-style winter tents tend to offer better flexibility in terms of snow shedding and quicker assembly.
Next up, you want to opt for a smaller-sized tent for your winter camping trip. Sacrificing the extra storage space and headroom goes a long way in insulating your tent without actively doing much.
A smaller tent will have less space to heat up or actively insulate i.e., a lesser surface for water to condense on and even a smaller area to radiate heat. Therefore, always opt for a small tent that is just big enough for your needs.
Ventilation is always the key to solving dampness and condensation build-up inside confined spaces. However, you want the ventilation system to be well-done to prevent undermining your insulation measures.
A fully-sealed tent traps heat and moisture inside resulting in condensation build-up. Water beads up on the underside surface of the tent and drips away throughout the night. “Where does the moisture come from?” you may ask.
Well, moisture could be from the wet items inside the tent, humidity in the air, or from our bodily functions. Moisture is generally a byproduct of our normal breathing and respiration.
Avoid keeping wet clothes or boots inside the tent as they eventually lead to cold and condensation build-up. Brush off any ice particles from the tent in the morning and sweep them outside.
A whisk broom works very well for brushing all the snow off your boots and clothes before getting them inside the tent.
Additionally, invest in a winter tent that has plenty of ventilation points to minimize any potential formation of condensation inside the tent. The various openings on the tent should have bug nettings, storm flaps, and easy-to-use closures.
Consider pitching the tent with the door facing a gentle breeze, if any, and stake down the tent tautly to considerably maximize airspace inside. If you have opposite-facing vents, keep them open for the much-needed cross ventilation.
While you may opt for a well-insulated quilt to form part of your sleeping system, we highly advocate for sleeping bags due to a couple of reasons. Sleeping bags offer all-around comfort and warmth including at the back and head section.
That said, the most important features to look out for in a sleeping bag include the type of fill and shape of the bag. Other features you might want to scrutinize are the shell and inner lining, zipper system, baffles, hood, and footbox.
Further, standard temperature and season ratings such as EN and ISO ratings could make your decision a little easier.
Your sleeping bag of choice should be compliant with the EN 13537 European Standard or the ISO 23537 International Standard to ensure it provides comfort and insulation in specified temps. Always go for 4-season sleeping bags as they are designed to handle temperatures below 15 degrees Fahrenheit.
Furthermore, using the “Comfort” ratings instead of the “Transition” and “Risk” ratings is highly recommended when deciding what you need.
You want the comfort rating of the sleeping bag to be “higher” than the expected temperatures at the campsite. For instance, if you anticipate temperatures will dip slightly below 32 degrees Fahrenheit, then a sleeping bag with a comfort rating of 20 degrees Fahrenheit or lower would be the ideal choice.
In addition, you want a sleeping bag made of hydrophobic down filling with a high fill power and a relatively low fill weight. The fill power refers to the fluffiness of the down while the fill weight translates to the actual weight of the filling.
Extra fluffiness or volume in the filling layer inside the bag results in more dead space to trap air and further improve insulation. Since down becomes less effective when it gets wet you want to stick with sleeping bags made of hydrophobic or water-resistant down.
Down/synthetic- or fully synthetic-filled sleeping bags are the next best alternatives if you’re in the market for a durable, water-resistant unit.
When it comes to the shape of the sleeping bag, winter conditions are better combatted using mummy-style bags. These types of bags are known to have hoods and snug fittings allowing for optimal retention of body heat.
Other shapes including rectangular, semi-rectangular, elephant’s foot, and spoon designs, might be acceptable if there is not too much empty space left inside the bag.
Moreover, you want to pair your warm sleeping bag with a suitable removable sleeping bag liner and other accessories for the best results. A sleeping bag liner not only adds some extra degrees of warmth to your sleeping bag but also extends its life. The liner similarly allows for easier cleaning and maintenance.
Consider going for bag liners with hollow-core fiber insulation whenever possible. Otherwise, those made of cotton, silk, fleece, or synthetic materials will still suffice. Throw in a comfy camping pillow, eye masks, and earplugs and you will almost be set for a sound night’s sleep.
Insulation can only do so much – you will most likely need additional solutions to generate heat and keep you warm. Campfires, tent heaters, and layered clothing take on a more meaningful role when camping in the cold winter.
Some methods will demand heavy, bulky, and dangerous appliances but for the most part, many of the solutions are crude and pretty much straightforward. Let’s dig in…
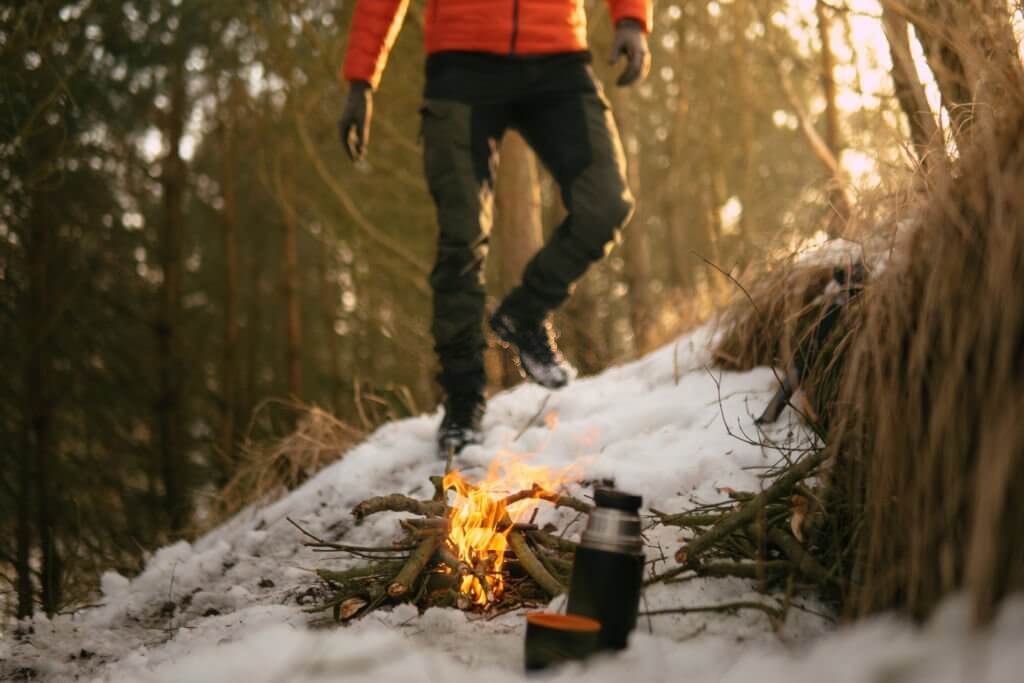
Like song and dance, campfires go well together with winter camping. There is no greater experience than sitting around a fire pit, sharing stories, and drinking warm beverages through the night.
Interestingly, starting a fire has always been a simple, inexpensive way to generate heat and beat the cold.
You will need some tinder, kindling, wood fuel, a fire pit, and a fire starter to make a campfire. Still, learning how to make a fire with rudimentary means can be a good survival skill. Practice making a fire at home using simple techniques before heading out for camp.
Some techniques you can try include the hand drill, fire plow, bow drill, flint and steel, and battery and steel wool methods.
With that in mind, bear in mind that firewood can be hard to come by in winter conditions, and more so making a Leave-No-Trace compliant fireplace takes a lot of effort. Any downed and dead wood will most likely be wet under the snow.
That said, building a campfire will probably be the only option in a real emergency.
A camping stove is often a more fuel-efficient alternative to a full-blown campfire. Plus, you can use it to cook your meals and boil your drinking water.
If you intend to use a wood-burning tent stove inside the tent, always ensure your tent comes with a stove jack and is made of fire-retardant fabrics. The last thing you want is to burn down your shelter or worse yet suffer from carbon monoxide poisoning.
Liquid-fuel and canister stoves can be substantially safer choices than wood-burning tent stoves.
By the same token, some campers place heated rocks and water packs filled with hot water inside the tent for warmth. Either hack works great, but you should always be careful when handling hot objects to avoid scalding yourself or melting a spot on your tent.
Try wrapping the objects in a towel, clothing, or layers of foil and place them on a board inside the tent. On the other hand, you may want to opt for tent heaters given how easy they are to use.
When it comes to tent heaters, you may choose between two main types namely electric-powered and gas-operated heaters. Candle heaters can be used too but they are not very effective at heating large spaces. Expressly, tent heaters can be seen as safer alternatives to your conventional camping stove or outdoor campfire.
Regardless of which type you go for, always keep in mind that they are dangerous and can get too hot to touch. Moreover, gas-powered tent heaters pose more dangers of carbon monoxide poisoning than electric models.
Consider getting a tent heater that will be enough to heat the space in your tent. Check the heater’s specs for its BTU (British Thermal Units) rating.
If you go the gas-powered route, consider getting an oxygen depletion sensor to warn you of possible CO poisoning inside the tent. Since most gas heaters are sold without the accompanying fuel cylinder, be sure to shop around for compatible propane or butane one.
On the other hand, electric tent heaters are more portable and release zero emissions. Although you might find a battery-powered option, plug-in options are the most popular. Therefore, your campsite or campground must have Electric Hook-Ups (EHUs).
Electric tent heaters come in three main types including fan-forced, radiant, and traditional convection heaters.
Fan-forced heaters are the best at warming up spaces quickly while radiant heaters work more slowly allowing for gradual heating inside the tent. Infrared heaters work similarly to radiant heaters but without emitting visible light.
The last type, convection heaters, excels at maintaining high temps in confined spaces for long periods. Whichever type you choose, ensure it has safety features such as overheating protection, tip-over shut-off, built-in carbon monoxide or carbon dioxide sensors.
At the same time, you want to be proactive at preventing any incidents posed by using heaters inside tents. Ensure your tent is well ventilated whenever you’re using a tent heater and switch off the heater before sleeping.
Keep in mind that some heaters, especially gas-powered ones, are not meant to be used inside tents.
Now that you have done all that you can to insulate and warm up your tent, it’s time to focus inwards. Remember that the goal is to minimize the loss of body heat to the environment. So, carrying out simple practices such as exercising, wearing warm clothes, or even eating right could go a long way in keeping yourself warm.
Layering up your clothing is perhaps the most fundamental approach. The best way to fight the chilly and drizzly winter weather is to dress in a tri-layer clothing system. If implemented correctly, the layered clothing is guaranteed to keep you warm both inside and outside the tent.
This topic has been extensively covered in our article about layered clothing and you might want to check it out.
Metabolism is the major source of body heat in humans. So, it stands to reason that taking meals and beverages could help generate more body heat. Eat foods rich in calories and drink a cup of hot chocolate or herbal tea to increase body heat.
Taking soup is equally a good way to rehydrate and warm up.
Avoid taking alcohol when winter camping as it increases your risks of hypothermia by giving you a false sense of warmth. Plus, it’s naturally a diuretic meaning it might lead to more bathroom breaks and dehydration.
Remember to stay hydrated by drinking water keeping in mind that dehydration sometimes impairs the body’s ability to generate heat. In the same vein, stick to one cup of hot beverage to avoid waking up several times in the night to pee.
Reusable or disposable heat packs offer a good way to warm your hands, feet, and body. You can toss a few packs in your pockets or at the footbox of your sleeping bag to keep you warm during sleep. They work by releasing heat after continued exothermic chemical reactions.
Ensure you get warm first before hitting the sack for better heat retention and regulation. You can try a few exercises like doing star jumps or taking a walk to raise your body temp. But not too much as to cause a lot of sweating as that would be counterintuitive.
Finally, you want to have an actionable response plan in case of incidents such as avalanches, blizzard strikes, thunderstorms, hurricanes, floods, and cold-related illnesses.
Related: How to stay warm while camping.
You don’t need a log cabin or a complex Igloo-like winter shelter to enjoy the spectacular winter wonderland. A combination of proper planning and investing in the right gear will take you a long way. Insulating your tent is an inexpensive and easy way to extend your camping season well into winter.
However, if you have kids, then camping in very cold winter conditions would not be a good idea.
Charlie Leone
Website Owner/Editor
Welcome to CampingManiacs