- Camping Tips
- Hiking Tips
- RV Camping
- Destinations
- Blog
- Gear Reviews
Fire crafting is one of the most fundamental survival skills for both outdoor lovers and camping enthusiasts. Particularly, making a fire without matches forms the very basics of bush craft skills and can be challenging at first if you don’t follow the tried and tested methods to the letter.
For a successful conjuring of a campfire from nothing but sticks, you will need to employ lots of patience with the various methods. But, as you will find out, the rewards will be worth it.
There are three main ways to make a fire with sticks namely; the hand drill, the fire plow, and the bow drill.
These methods will more or less utilize friction to start the fire from embers into a flaming campfire, much like would be achieved with a lighter or a box of matches.
Wait, But Why Sticks?
The materials and tools will be readily available in the wild so, learning to make fire with sticks seems like an obvious place to start.
Since surviving out in nature doesn’t accommodate homey conveniences like a water purifier or readily available bottled water, you will need to find a way to treat your drinking water. A good option for this is to boil the water, something that can only be achieved with fire.
You may also need fire to send distress signals, cook food, clean and dry clothes, for warmth, to ward off wild animals or insects, and to sterilize utensils, knives, and other equipment.
Before you get too worked up on how to go about the whole process, let’s get some essentials first and more so learn about campsite regulations concerning campfires.
In campsites that allow campfires, there’s usually an existing fire pit that you can utilize. Alternatively, you can identify a suitable area and set up one.
However, if the park or campground doesn’t permit setting up of any campfires, you will have to try out these methods in your backyard or other suitable places.
Prohibitions toward building campfires in some campgrounds are put in place due to environmental concerns as well as to protect archaeological artifacts.
The ideal space to build your fire should be free from dry, hazardous conditions and must be set up about fifteen feet away from trees, shrubs, tent walls and/or any other flammable materials. You should also avoid areas with low-hanging branches.
Areas with logs, brush or even decaying leaves and vegetation should also be avoided as they can accidentally fuel up a wildfire.
Keep in mind the direction of wind flow to avoid the fire being blown away in the wrong direction. Generally, make sure to follow all the fire safety guidelines as spelled out by Smokey Bear. After you’re done identifying your campfire spot, it’s time to get some supplies.
To start the fire, you will need three main indispensable requirements:
Small twigs, dry leaves, fine dry grass, and dry bark crushed into fine dust will make do for tinder while slightly larger sticks or dry wood shavings will work fine for kindling. Fuelwood is the bigger chunks of wood that will burn slower and for longer to keep your fire burning.
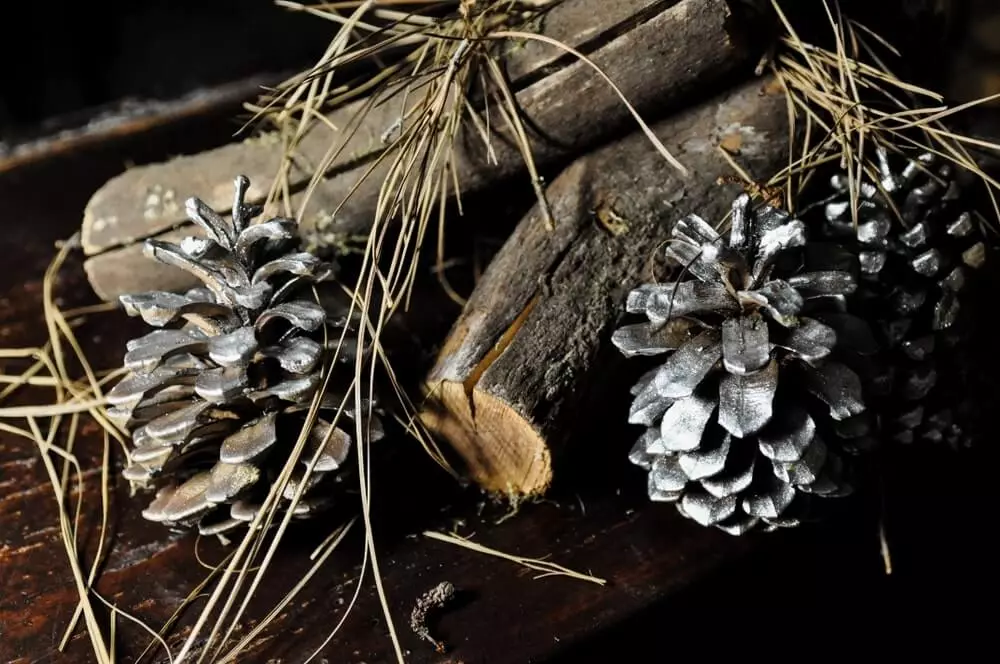
Dried dandelion, coconut husks, tinder fungus, cotton balls, cattail fluff, and birch/cedar bark shavings can also make very good tinder while dried herbivore dung or dry pine cones can make for kindling when in the wild.
Since you will be using sticks to make the fire, all the materials must be bone dry to bear a healthy friction-based fire. The drill and the fireboard should be made of light, dry and non-resinous wood.
Maple and Poplar are good wood options for making your drills.
A good option when it comes to collecting your supplies is to buy near the campground or collect from the same area if the rules of the campground or the national park permit it.
If you bring your supplies from far away, you may bring along a pest infestation to the area and further affect the new environment.
A good practice to accelerate the fire making process is to have your firewood well-setup before even starting the fire.
Form a teepee shape out of your fuel materials, starting with the tinder at the center-bottom followed up with larger sticks and lots of timber on the outer side. Make sure to leave enough spacing within the teepee to allow oxygen to pass through the housing and feed the flame.
Leave an opening on the side from which you may place your ignited tinder to help build the fire from the center.
Lastly, ensure you have some water available to put out the fire when done or when it gets out of control.
As earlier stated, the three main methods of making a fire with sticks are the hand drill, fire plow and bow drill. What does each one of these methods involve? Which one should be your best bet?
The most primal of all, hand drilling requires some unwavering resolve, patience and of course wood. The end goal for the hand drill method is to rotate the stick repeatedly until the friction causes enough heat to make embers at the base of the stick.
You will start by preparing your fireboard, spindle and tinder nest.
The fireboard should be a flattish/level stick that can be held easily with your feet as you will be using both hands to operate the fire-starter stick. Cut out a V-shaped notch on it preferably at a natural hollow in the stick or wood such as dead knots and shakes.
The cuts can be done using a pocket knife or just a sharp-edged rock. Remember to make another notch on the edge of the fireboard from the other one to allow any embers formed to drop to the collector bark on wood below.
As for the spindle — the stick that you hold and roll between your palms — it should be straight, slightly thicker than a pen, smooth and about 15 to 20 inches in length. Rough-textured ones may cause blisters and you most definitely don’t want that.
Next, place the fire-starter stick into the notch on your fireboard and start rolling it with your hands while maintaining pressure. Keep spinning until some embers are formed on the board.
Once there’s a glowing ember, tap the board carefully to let it all rest on the bark or collector wood then transfer it to your tinder nest. Blow gently on the tinder to start a fire and slowly build your fire with kindling first then add some fuelwood.
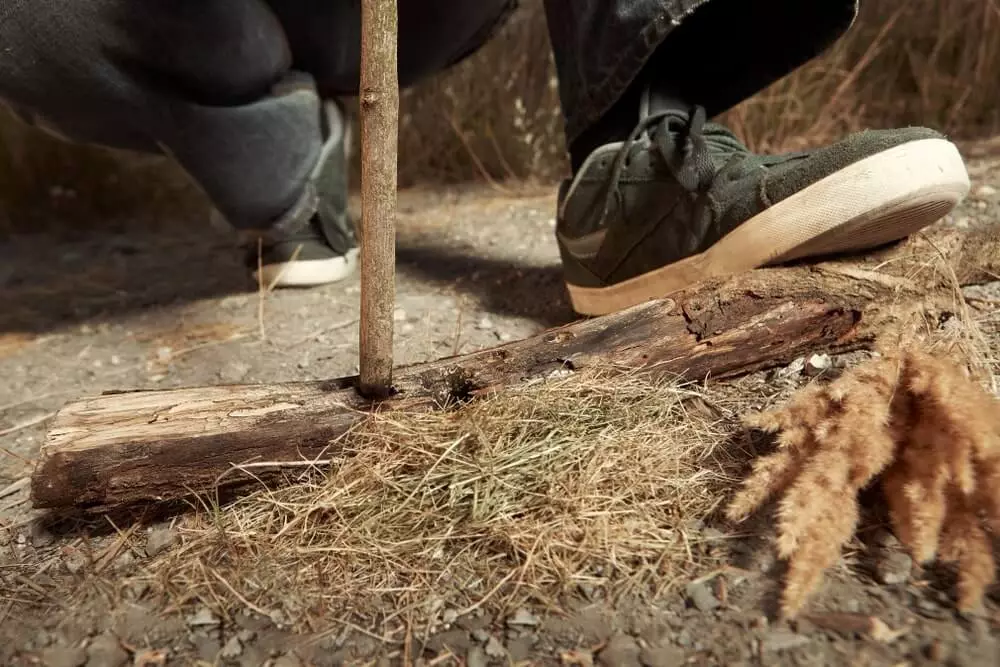
Another way to start a fire with sticks is the fire plow/plough, which also requires a spindle and a flat fireboard.
Etch out a groove into the fireboard and place some tinder on one end to catch embers more easily. Then, place the point of your spindle in the groove and start rubbing the fire-starter stick up and down the groove.
The embers will be easily plowed into the tinder after which you may blow the tinder nest gently to start the fire. You will then build up the fire with kindling, then add some bigger chunks of wood and split logs for a healthier fire.
This is a huge improvement on the hand drill method and is arguably the most effective of all friction-based means of starting fires. You will have an easier time maintaining pressure and speed as compared to the hand drill method.
In addition to the spindle and fireboard, you will also need a bow and a socket for this method to work.
Ensure that the bow is as long as your arm and made of a flexible, slightly-curved piece of wood. As for the string, a tough rope will be needed. A drawstring, shoelace, strip/rawhide or pretty much anything that won’t break midway will also work just fine.
Natural cordage such as dogbane and nettle can also be used for the bowstring.
Since you will be applying a lot of pressure on the bow, go for green wood instead of deadwood as this tends to break easily. The bow should be stiff enough to avoid bending when in use and light enough to easily control and move back and forth.
The socket or the handhold is for putting pressure on the top end of the fire-starter stick while you rotate it with your bow. It should be a harder piece of wood than your spindle, bone or a just a stone with a smooth depression in it.
The handhold should be fist-sized with a notch or hole where you place on the blunt end of the spindle and press down on.
Particularly, go for wood that has oils or sap as these will offer good lubrication between the socket and the spindle. To improve on the lubrication, you may also apply resin or lip balm if available.
Prepare the board as you did with the hand drill method then with your stringed-bow, catch the fire-starter stick in a loop of the string.
Next, place the tip of your spindle on the notch of the fireboard and apply pressure on the top of the spindle with the socket.
Technically, your apparatus will be working as an elementary mechanical drill that will cause friction to spark of embers for your fire. Use the bow to start sawing back and forth until you form an ember.
You will notice that the spindle rotates more quickly and you use less effort as you did with the hand drill method. As is routine, with the emergence of the first few embers, drop them into the tinder nest and blow gently to start your fire.

Yes, the above methods cannot be the only rudimentary ones to start a fire. Ever since man discovered that he could make fire, he has never ceased exploring for fascinating ways to conjure the ever precious form of energy. Below are some of the other techniques used to bring the flames to life.
In addition to the rudimentary options mentioned above, we have other friction-based ways to make a fire such as a pump fire drill and the two-man friction drill. They are essentially just improved options of the bow drill well-designed for a quicker and less-strenuous fire making process.
The pump fire drill, for instance, uses a flywheel to produce just-enough friction to make embers while the two-man drill is operated by two people for a firmer pressure on the spindle.
Concave and convex lens and surfaces can be used to direct enough sunlight to ignite some tinder without much work. You may opt for traditional lenses such as a magnifying glass, binocular lenses or eyeglasses.
Alternatively, you can also get creative by filling up balloons, condoms, water bottles or plastic bags with clear water to form some sort of convex lenses. You may also find shiny concave surfaces like the bottom of a soda bottle being used to ignite tinder using sunlight.
If you compress air under high pressure, it will get very hot (upwards of 800 degrees Fahrenheit). The fire piston applies the same principle to light up tinder, which is strategically placed at the end of the piston.
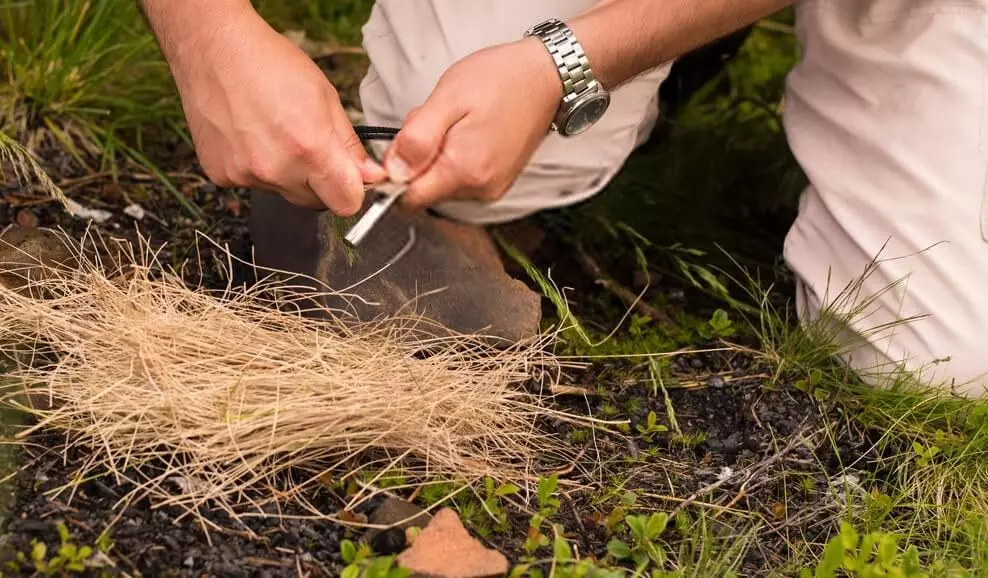
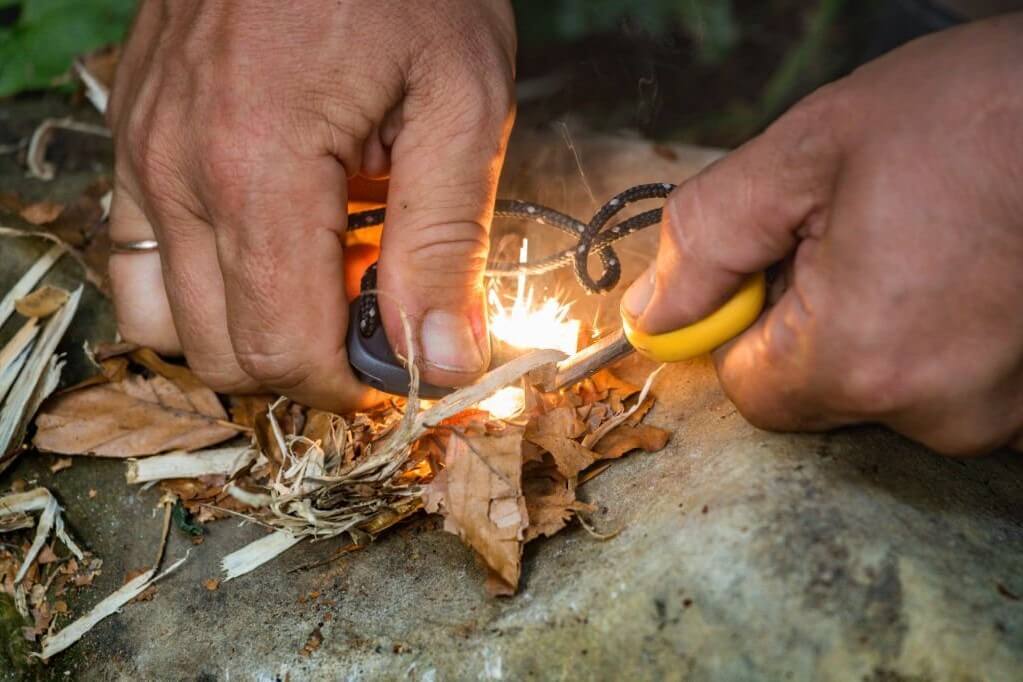
You can also implement spark-based fire-making techniques such as striking two rocks against each other or more effectively by striking steel against hard flint. Some good combinations include magnesium and steel, flint and steel or a quartzite and an axe head.
Lastly, you can also try out circuit-shorting options such as rubbing a battery on steel wool or tin foil. While it might be surprising to have either of the items in your possession and not a matchbox, the method allows fire-making even in the soggiest conditions.
Related: Best camping axes and hatchets revealed.
While there isn’t a single answer to this question, our team has managed to conjure a fire with sticks and a bowstring in about 10 to 15 minutes.
The time it will take you to ignite a fire using sticks will largely depend on factors such as the type of wood you use, how dry the sticks are, how sunny the weather is and even how persistent you are with exerting the pressure.
As it were, it will take a total novice longer to curve the drill, to fix the bow and have the fireboard ready. The same cannot be said of an experienced person.
Your first attempts will be challenging and you may take even one hour without seeing any embers. With experience and repeated trials however, you will reduce this time greatly to the average of experienced survivalists.
Making a fire while it’s raining, more so when using primitive means can be very challenging. Therefore, it’s important that you be prepared beforehand in case of possible wet conditions.
Ensure that you have a good supply of dry tinder, kindling, and fuelwood safely stored away. It’s best that you start learning on making fire when the weather is conducive to be able to tackle the challenges of when it’s raining.
You will also need to have a camping knife and a hatchet at hand for quick fixes like making kindling out of thin wood shavings or feather sticks.
Lastly, as a precaution, you may need to bring other non-friction-based fire starters like the spark-generative options.
In a nutshell, wood that can be easily powdered by friction and wood that’s “not really wood” are good choices for the fire sticks. You can try the following choices:
Just make sure the firestick is dry, not too thick and that the fireboard is dry and equally complementary. Ideally, you want the two pieces of wood to share the same softness or alternatively go for a spindle that is harder than the board.
A good practice when rolling the firestick is to build up the momentum little by little whilst maintaining pressure on the board as this will give the wood time to warm up. Once you see some smoke then it’s time to speed up the drilling.
The hand drill is a popular rudimentary fire making method that has survived many centuries due to its straightforwardness. It’s the perfect starter when learning survival skills. In fact, the bow drill and fire plow are just its offshoots.
To overcome some of the failures at the beginning, you may want to acquire a good set of equipment and improve your technique before setting out for the wild.
It’s within good practice to try out the methods discussed above in your backyard before heading out to the wild. Fire making with sticks will provide you with a solid foundation in your journey to mastering bushcraft skills.
That said, it’s time to reward yourself with some s’mores and marshmallows and enjoy the hearty around-the-fire talks if you have fellow campers, you earned it!
Charlie Leone
Website Owner/Editor
Welcome to CampingManiacs
Awesome tips. Thanks!
Hey JIV, thanks for stopping by. We are happy that you found these tips useful.