- Camping Tips
- Hiking Tips
- RV Camping
- Destinations
- Blog
- Gear Reviews

Whether it’s the solitary views or the immersion in nature, backpacking and hiking are easily some of the best methods of enjoying the great outdoors. If only you’d be able to cover more distance and spend multiple days outdoors!
Well, that’s where bike camping comes in.
It is pretty much the perfect upgrade to the rudimentary pitter-patter routine since you can cover more ground while packing light and maintaining a relatively low budget. Bicycle camping enables you to practice a healthier lifestyle, discover new cultures and landscapes, and use a more sustainable means of transportation.
Bike camping blends some elements of cycling and backpacking for an unbelievable experience outdoors. Put simply, it can be defined as camping with a bicycle.
Nevertheless, it can be a little intimidating for beginners and anyone looking to switch from other types of camping.
Understanding the basics and adequately planning your trip is always a good prerequisite before hitting the trails with your two-wheeler.
Whether you’re a beginner or expert bike camper, the following guide lays down everything you need to know to not only get started but to also improve your bike camping experience.
The term “bike camping” is mainly used as a catchall for its many different types. Bike touring and bikepacking are the most popular types of bike camping but can be further distinguished as below.
This type of bike camping involves traversing diverse topography for single or multiple days on a particular cycling route. Bikepackers pack lightly for optimal efficiency and freedom of travel. It perfectly blends cycling with ultralight backpacking and is often symbolized by the streamlined bags and components on the bike. Bikepackers are free to take on rocky terrains, sandy grounds, river crossings, and even steep inclines.
Cyclists often carry all they need for the camping trip, including a tent, food, cookware, and other essential supplies. It’s more focused on longer stays outdoors rather than ultralight packing for more ground coverage. While it may be inexpensive and liberating, be prepared to carry around lots of gear and hefty cargo bags on the bike.
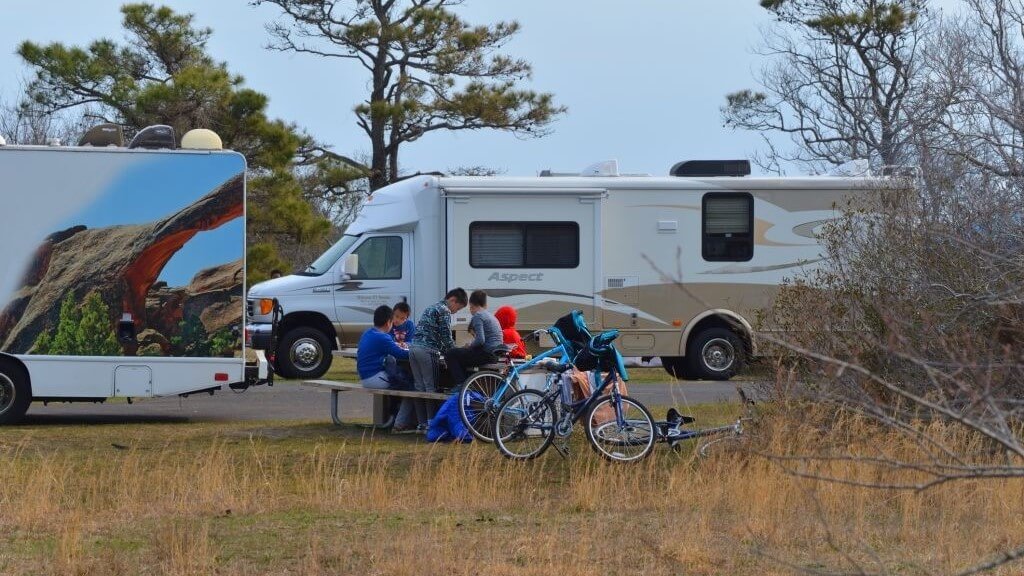
Mostly done by small groups or touring companies, this type of bike camping will have your trip supported by a motor vehicle. Most of your biking and camping gear will be stored in the car or RV that’s traveling with you. However, you must have someone to drive the vehicle, which often makes it slightly more expensive than other options.
Long-distance cyclists travel across borders, mainly through remote areas and developing nations. The bikes are usually loaded with camping gear, food items, tools and spare parts, and everything else that would be needed for multi-day bike camping. Expeditions can be a hassle to hack, given the varying country-specific legal requirements and other inconveniences.
A bit toned down on the cycling aspect, overnighters ride to the campsite of their choice and camp out for the night. It is ideal for weekender campers as it requires very little planning.
That said, most of what you’ll need for either of the bike camping types will be pretty similar across the board. Ideally, you want a suitable bike with its appropriate gear and a good quality camping tent to match.

Investing in a good-quality bike ensures that you won’t spend too much time on frequent repairs and maintenance. Plus, it goes a long way in making your camping trip more enjoyable, lengthier, safer, and more manageable.
Getting a second-hand bike is highly acceptable and recommended, especially if you’re just testing out this type of camping. In most cases, the kind of bike camping you choose will significantly dictate the kind of bike to go for.
Preferably, you want a bike that’s durable, practical, stable, and comfortable, given that you’ll be on it for long periods and on bumpy trails and terrains. Some common factors to look out for when picking the right bike for this camping type include the following:
While most bikes can do light wild camping, you may want to zero down on specific types for the best performance.
Firstly, you may want to keep in mind that there most likely exists a perfect electric version for each type of bike. Electric bikes, also called electric pedal-assist bikes or eBikes, are fun to ride and tackle hilly routes and long distances.
Secondly, always consider the type of surface you will be riding the bike on. Is the surface paved, unpaved, a typical bike trail, or all the above? Below are the main types of bikes made for bike camping:
These bikes will mostly have drop-bar handlebars to allow the rider to remain in a streamlined position while riding. Generally, road bikes are ideal for bike paths and paved roads.
However, underneath these bikes are other more rugged versions: Gravel bikes, Touring bikes, Performance bikes, and Endurance bikes.
Gravel bikes and Endurance bikes are your best bet if you are riding on asphalt and gravel pathways. Their aerodynamic design and broader tires allow for better traction over many different types of surfaces.
Touring bikes are suitable for fully loaded long-distance rides, while Performance bikes fare extremely well for activities such as ultralight overnighters, organized tours, and fast travel.
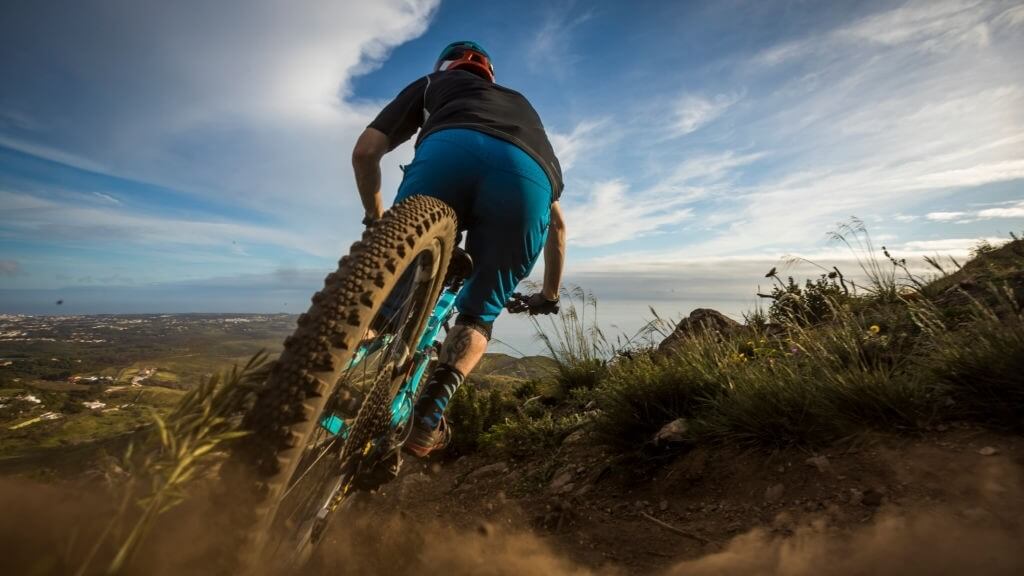
Most mountain bikes feature lower gears, shock-absorbing components, and solid builds for off-roading, dirt trails, and uneven surfaces. Fat tire bikes, Downhill or Park bikes, All-Mountain bikes (Enduro), Cross-Country bikes, and Trail bikes all fall under this category.
They mainly differ from each other in terms of suspension, which can range from rigid, hardtail to full-suspension. Full-suspension and hardtail mountain bikes offer better shock absorption and comfort when riding off-pavement.
Also known as fitness bikes, Hybrid bikes try to combine elements of both road bikes and mountain bikes. They feature large diameter wheels and wider tires for speed and traction on off-pavement trails.
Cruiser bikes, Cargo bikes, Recumbent bikes, and Folding bikes fall under this niche group of bikes. While some are perfect for bike touring, others are best suited for vehicle-supported camping and on easy trails.
Cargo bikes feature strong builds capable of handling hefty weights and transporting plenty of gear. While they are efficient for long-distance bike camping, it’s usually at the expense of speed and easy handling.
Aside from the type of bike, another factor you’ll have to consider is its price. Expectedly, electric bikes will be costlier than non-electric options, but the frame material, suspension, and overall quality of the bike may also drive up its price.
Most bike frames are made of steel, which is preferred for its durability and strength. The material has two main variants, namely carbon steel (high-tensile) and Chromoly steel (Chrome Molybdenum), with the latter being the most pricey and lightweight of the two.
Aluminum bike frames are also quite common as the material tends to be more affordable, lightweight, and stiff.
High-end bikes will most likely have frames made of either titanium or carbon fiber frame owing to the materials’ feathery weight, strength, and shock absorption. Notably, since carbon fiber laminates tend to be very brittle, bike frames made of this material tend to be more powerfully built than needed.
In a nutshell, if working on a tight budget, then you may want to consider bikes with frames made of either steel or aluminum.
The primary function of the bike’s suspension system is to dampen the bumpiness of the terrain, allowing you to have a smoother ride. A bike will either have just a front “fork” suspension (hardtail), a front and rear suspension (full-suspension), or no suspension (rigid) at all.
Dual-suspension bikes can take on a wide variety of rough tracks but often come at a premium price. Full-suspension bikes' repair and maintenance costs also tend to be on the high side compared to hardtail bikes.
Speaking of which, hardtail bikes are relatively cheaper to maintain, lighter, and more versatile than full-suspension options. Bikes with rigid frames are the most affordable but most restrictive as compared to all the other types.
Lastly, bikes with full-suspension systems come highly recommended for riders with joint or back complications. However, only professional bicycle mechanics can bail you out if the suspension system breaks down, which might not be possible when riding in the backcountry.
Next up, you must also dig deep into other factors that might influence the overall performance of your dream bike. Aside from the frame and suspension, you’ll need to consider your bike’s tires and wheels, the drivetrain and gearing, the brake type, and the size & fitting.
The size of the wheel and tire is mainly determined by the type of bike you choose. Perhaps the only things you need to be mindful of here include the size availability and treading on the tire.
If you plan to take long expeditions across borders, going for bikes with the standard 26” wheel size is wise. Off-roading and riding on rough terrains will require a bike with broader and more treaded tires for better traction.
That said, 27.5” (650b) and 29” (29er) wheel sizes are also on the come-up and have been well-adopted by racers and bike campers alike.
When it comes to your bike’s brake system, you mainly have two options, i.e., rim brakes and disc brakes.
Rim brakes are the most popular of the two and have been the standard for several decades. They work by applying the braking force via brake pads directly to the sides of the wheel or the rim.
While they are easy to maintain, rim brakes tend not to work effectively if the rim is muddy or wet, and they may also wear out the wheel rim prematurely. Disc brakes, on the other hand, resemble those in motorbikes and cars.
Unlike rim brakes, disc brakes provide better braking power and control in all weather conditions. Disc brakes come in two main options, i.e., hydraulic disc brakes and mechanical disc brakes, which all work by gripping onto the bike’s wheel hub.
Hydraulic disc brakes offer a more robust and less-jerky braking force with minimal effort, plus they are designed to self-adjust to counter any brake pad wear. The only major drawback of disc brakes, in general, is that they may be harder to replace or even inspect than rim brakes.
Other types that you may find in some bikes consist of drum brakes and coaster brakes. However, they are usually not very practical for bike camping:
Another critical aspect to consider is the bike size and, more so, how comfortable it is. After all, comfort translates to improved speeds, longer distances, and ultimately an enjoyable bike camping experience.
Luckily, most bike manufacturers and sales outlets will include charts to help you gauge the correct bike size for you. Pay close attention to the following measurements whenever they’re provided, i.e., the standover height, reach, stack, and standard sizes (XS, S, M, L, XL).
Don’t worry about the seat height or saddle set-back positioning now, as those can be easily adjusted whenever needed.
If you happen to have the bike in front of you, stand over the middle of the top tube and ensure there’s enough clearance between you and the bike. A clearance of about 1-2 inches for road bikes and 2-4 inches for mountain bikes should be fine.
The resulting height (your inseam minus clearance) is what’s called the stand-over height of a bike frame.
When buying online, you’ll have to measure your inseam length and height then use the seller-provided sizing charts for the right bike size. The inseam length is the distance from the ground up to your crotch.
Alternatively, to get a rough estimate of your ideal bike size, multiply the inseam length by a factor of about 0.66 to 0.70, depending on the type of bike. Go with a higher factor if looking to get a road bike or a lower one if going for a mountain bike. However, bike sizes differ from brand to brand, and thus the manufacturer-provided sizing charts are your best bet.
In some cases, the manufacturer may also indicate the stack and reach measurements of the bike. The stack and reach measurements give you a rough idea of how tall and how long the bike frame is, respectively.
While the drivetrain and gearing may not be worth overthinking, do keep in mind that lower gears make for simpler pedaling. Also, always go for bikes with leather saddles as the leather material conforms to your bottom’s shape over time, allowing for a comfier ride.
Drop-down bar, butterfly bar, and straight bar handlebars tend to be more comfortable to handle over long hours, but mileage may vary.
Lastly, you can always swap some of the bike’s components for the ones you prefer after purchase. There are also plenty of aftermarket accessories you can get to help improve your riding experience; they include the following:
Most of the accessories are inexpensive and may not even require visiting the bike repair shop to install them on your bike.
Before you jump into it, ensure you’ve got basic skills on (of course) cycling, bike repair, first aid, and wayfinding. Not repairing tire flats, replacing broken spokes, or even lubricating your bike’s moving parts could easily ruin your trip, especially if you plan to camp out in remote areas.
A familiarity with route discovery and navigation tools, as well as how to correctly pitch a tent, will also go a long way. You’ll also need to take your bike for a tune-up and get the essential bike camping gear before planning your trip.
Planning out your trip will help you better mitigate against any unforeseen challenges and stick to your budget.
Start by narrowing down your route options by considering factors such as the following:
Keep in mind that some bike trails and campgrounds are usually closed off or inaccessible due to severe weather or snowfall. You’ll also want to plan your trip according to the various climatic conditions of the areas you intend to visit.
You’ll need to plan around time and distance limitations by at least going for routes with favorable terrains, improving your fitness levels, and setting attainable daily goals for multi-day bike camping trips.
If you consider site attractions integral to your trip, design your route around your favorite places of interest. Whether it’s the hot springs, historical ruin, museum, or scenic viewpoints, feel free to tweak your route to accommodate such destinations.
While the tent will suffice for an outdoor shelter, you’ll be required to pitch the tent in designated campgrounds in most cases. You may even be forced to reserve hotel rooms for overnight stays whenever setting up a tent is out of the question. Therefore, places to sleep and eat should be well mapped on your bike route.
To avoid the dangers of riding through traffic, plan your route on secondary backcountry roads, unpaved trails, and other cycling-friendly trails. The National Forest Service Interactive Travel Map is a great tool that can help you discover less-busy forest service roads.
Longer routes will most likely require you to use some form of public transport, for instance, shuttling, trains, air flights, and public ferries, among others. They’ll come in handy for getting you back from the finish point, so do consider including all the appropriate options in your logistics plan.
You may also get inspiration from bike camping forums and websites, check out bike trails on maps, and state atlases such as National Geographic’s Trails Illustrated Maps and the Benchmark State Atlases.
Also, feel free to follow any advice provided by guidebooks, websites, and local guides to best design a suitable bike route for you. Rangers and the local people are also very informative about the various locations and the best routes.
After you’ve zeroed down on where you are going, you can now design and create your GPS track to be loaded into your bike’s GPS device. There are plenty of tools that can help you draw your route based on all the gathered information.
Online maps such as Google Earth and Google Maps have inbuilt tools that you can use to draw your route and mark out areas of interest. Other more specialized tools to draw and record your GPS track include Ride with GPS, Topofusion, Gaia GPS, MapMyRide, and Bikemap.
Alternatively, if you find the exercise slightly daunting, you can always borrow preplanned routes from trail share websites and apps such as Wikiloc, MTB Project, and RidewithGPS. The MTB Project, which features plenty of exciting bike trails and adventures, was initially developed by the International Mountain Bicycling Association (IMBA) and Adventure Projects Inc.
Something you really want to do now is to double-check that you have packed your gear accordingly, then off you go.
Time to put your research and plan to practical use, have fun on your bike camping adventure! Also, don’t shy away from tweaking the route plan to counter any hiccups you may face along the way.
Taking notes along the way will also be very useful for easier rerouting and future improvements on the experience.
With your new bike at hand, you’ll want to gather a few items to make your trip a full-on bike camping one. You’ll need your bike essentials, camping gear, some safety items, and any personal items you might need.
To ensure that your trip doesn’t come to a halt due to bike malfunctions, you’ll need a well-kitted bicycle repair and maintenance toolbox. It should include some spare parts, a patch kit, extra inner tubes, a mini hand pump, plenty of bungee cords, multi-tool sets (screwdriver and/or Allen key set), 2 or 3 adjustable wrenches, and zip ties.
You may also need a small rag to clean up the bike and wipe any oil smudges. It’s also highly recommended that you consider getting most of the accessories mentioned above for better preparedness.
Investing in good-quality riding clothes is also more than warranted. First off, you’ll need to get a properly fitting bike helmet, then some bike shorts, socks, jerseys, bike gloves, rain gear, bike shoes, and sunglasses.
Remember to layer up according to the weather conditions and always travel prepared with a change of clothes when bike camping in winter or very cold weather conditions; a skull cap, a good winter jacket, full-length thermal pants, insulated gloves, and waterproof overshoes should be part of your biking clothes.
Aside from your riding clothing, you’ll also need to pack camp clothes that obey the multi-layer dressing technique for the outdoors. With that in mind, your camp clothes should comprise the base (moisture-wicking) layer, the middle insulative layer, and the outer shell layer.
Long-sleeve shirts, shorts, and long pants made of preferably wool will be perfect as base layers, while warm fluffy sweaters, coats, jackets, and/or vests will do for the middle layer. Lastly, you need some protection from the sudden downpour and the elements.
Here’s where waterproof ponchos, raincoats, and jackets shine; they keep water out while the rest of the layers ensure you stay warm and toasty.
It’s advisable to follow the tri-layer approach when camping out, as you can always shed a layer or two whenever the weather is most favorable.
Multi-layer clothing is not all you will need at the campsite. The following items should feature prominently in your bike camping checklist for a good time in the great outdoors.
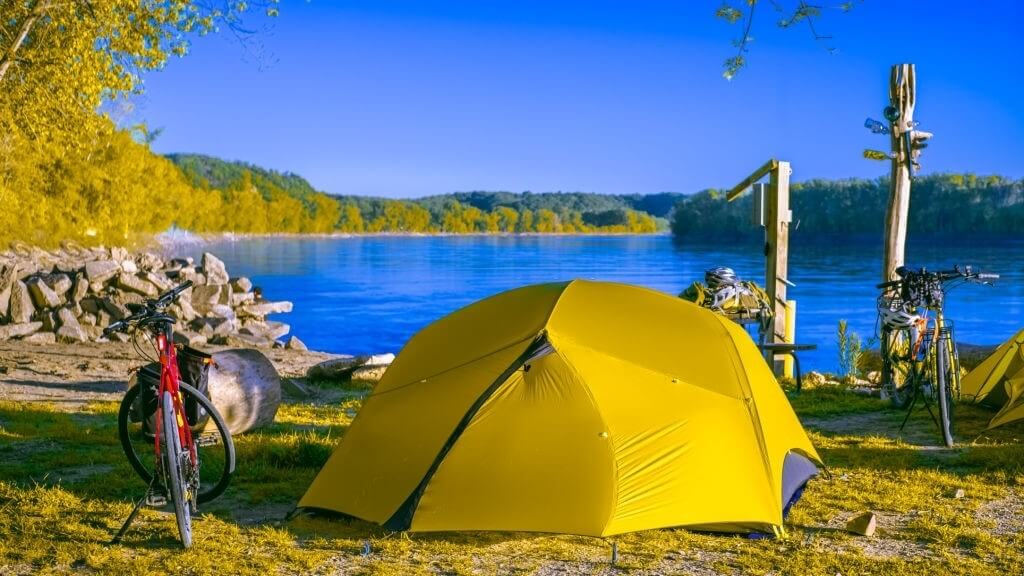
Regardless of the type of bike camping you choose, getting a good quality tent is very crucial. Ideally, you want the tent to be very lightweight and portable for easy transportation on the bike. It should also be rugged and protective of shielding you from the elements.
The most important factors to consider when getting cycle touring and bikepacking tents include:
You’ll also want to consider getting a tent footprint, extra stakes, a stake hammer, and a tent repair kit.
If camping out in warm and fair weather, you may ditch the tent all together to favor a minimalist tarp shelter or Bivy sack. However, some setups for the tarp shelters may require you to disassemble the bike wheels to use them as part of the outdoor shelter’s frame.
Inside your cozy shelter, you’ll need a good quality sleeping system consisting of a sleeping bag or Bivy sack and a sleeping pad. The sleeping bag should provide thermal insulation and warmth for a good night’s sleep, while the sleeping pad should add extra cushioning to the bag from underneath.
If you have the storage space on your bike, you may also want to get a low-profile and lightweight camping cot for better water protection and off-ground sleeping. Other optional items to improve your sleeping system includes a pillow, extra blankets, and/or even an air mattress.
For your survival out in the wild, you’ll need food and water. A cooler may come in handy for storing your pre-prepped meals but is usually too bulky for bike camping. That said, ensure to pack lightweight meals rich in nutrients and require minimal cleanups or prepping.
Snacks and energy bars are also highly recommended as you’ll be burning lots of calories while cycling. You can go for anything from trail mix, oatmeal, eggs, potatoes, ramen, dehydrated meals to pre-made tuna salad pouches, etc.
You may also pack some herbs and spices for the ultimate foodie experience away from home. However, feel free to pack up your meals according to your dietary needs and preferences.
To cook up your meals, you’ll need at least a camp stove, a cooking pot or a good ole iron skillet, and a wooden spoon. When cooking over fire pits, you’ll need a fire building kit consisting of gas lighter, waterproof/stormproof matches, firewood, and tinder.
There’s no shame in enjoying your meals in the cooking pot, but perhaps bringing along a bowl, one or two sporks, and a knife would be more convenient. A steel mug should also suffice for your hot beverages.
For your drinking water, ensure you have a good quality water filtration system at hand as well as purification drops and tablets. Also, consider getting large water reservoirs to keep around the campsite or on the bike.
Collapsible water containers are good options that won’t take up too much space when being transported on the bike. On-bike options include water bottles kept in the bottle cages or large water-carrying containers attached to the bike’s triangle.
Lurking within the beauty of the great outdoors is a lot of danger. Whether it’s the constant bug bites, imminent wild animal attacks, or cold weather, the great outdoors pose a great deal of danger. As such, it’s always a good idea to practice safety and head out fully prepared.
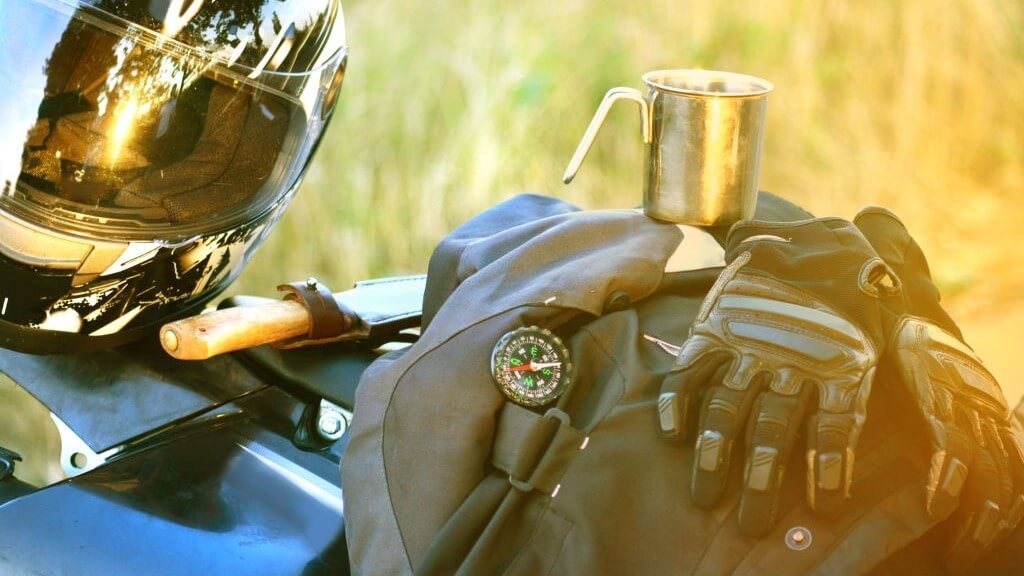
An excellent place to start is getting items such as a dog or bear repellent, a headlamp with extra batteries, a pocket knife, bug and mosquito repellent, and a first aid kit. Although a tad bit extreme, a personal locator beacon could easily cut down search and rescue time if you get lost.
When it comes to navigation, it’s always advisable that you combine several methods for the best results. You’ll need a paper map, a compass, a route plan, and, if possible, a GPS device. With its GPS capabilities and digital maps, your smartphone should also suffice as a secondary navigation device.
However, most GPS devices are bound to run out of juice; therefore, carrying a solar charger or a power bank to recharge them is more than justified.
Remember to acquire and pack all the required permits and travel documents, especially if you intend to visit certain parks or cross borders.
These include your hygiene essentials and toiletries such as biodegradable soap, sunscreen, lip balm, hand sanitizer or wet wipes, toothpaste, camp toothbrush, menstrual products for women, and toilet paper.
For the eventual downtime, you may pack some board games, a camera, playing cards, books, and everything else you prefer to keep you busy and having fun.
Loading up all the biking and camping gear on your bicycle is no easy task. Thankfully, there’s plenty of options you can make use of to alleviate this, all while maintaining a balanced and easy-to-handle load.
Some include mounting packs onto the frame or other sections of your trusty bike, while others are as simple as carrying a backpack.
The saddlebags or seat packs, frame packs, and handlebar packs form the primary storage systems for most bike campers. As compared to panniers, these bags are lighter, sleeker, and more aerodynamic.
Saddlebags are usually affixed to the seatpost just beneath the saddle. When properly packed, seat packs offer better wind resistance and streamlining than panniers. Good candidates to throw in these compartments might include a change of clothes, a sleeping bag, rain gear, and a sleeping pad.
You’ll also want to avoid overloading the seat pack by packing the weightiest things closer to the seat post.
Frame packs are made to fit in the bike frame’s triangle, formed by the down tube, seat tube, and top tube. Feel free to load heavy gear in these packs as the triangle location maintains good balance and a low center of gravity.
However, bikes with smaller frames or your preference for large water bottle cages on the down tube may limit the capacities of the frame packs. In these packs, you can store items such as the camp stove and its fuel, spare bike tubes, food items, bike tools, hydration reservoir (with a tube snaked up to the handlebar), and any other heavy and seldom-used items.
Rugged anti-abrasion handlebar packs also come in handy for storing lightweight gear such as a tent, clothing, and other items. They’re well-built to cater to different handlebars and don’t get easily damaged by the gear/brake levers.
Other accessory bags include top tube bags and stem bags that can be used to store small items.
Top tube bags are slightly bigger than stem bags and are attached to the top of the top tube behind the bike’s head tube. They offer an excellent place to store items such as trail food and other small items.
Stem bags also referred to as feed bags, are handy pouches easily strapped to the bike’s stem. They offer quick and easy access to items such as snacks, phones, speakers, water bottles, or even cameras.
To keep your hydration reservoirs at arm’s length, cargo or bottle cages can do the heavy lifting. Most bikes will come with threaded fittings on the underside of the down tube or the fork to where you can secure either of the cages.
Water bottles go in the bottle cages, and large bottles or gear can be stored in the cargo cages.
Put simply; racks are devices that can be mounted either to the front or rear of the bike for attaching panniers or cargo.
Front bike racks include; Porteur racks, lowrider racks, basket racks, suspension racks, and Randonneur racks. The racks are typically mounted to the bike's fork and will differ in terms of carrying capacities.
If trying to balance slightly heavier loads at the front, then front basket racks, lowrider racks and, Porteur front racks are the ideal racks to get. The low rider racks are specially designed to maintain the weight of the cargo or panniers closer to the ground for the best stability.
In most bikes, low rider racks can support loads of up to 35 pounds, while top mounts can hold gear of only about 10 to 15 pounds. Suspension fork racks and Randonneur front racks are meant to hold or secure very lightweight and small-sized bags
However, it’s not advisable to carry heavier loads on the front racks as that would compromise the bike’s steering and balance. Instead, attach your heavier panniers and cargo to the rear racks.
Rear racks offer a more stable platform to hold your bike camping gear on the bicycle. They are rated to handle loads of up to 50 pounds or even 100 pounds in heavy-duty models. Rear bike racks come in two main types, i.e., the bolt-on and seatpost rear racks.
The bike’s seat stays mainly supports bolt-on rear racks to carry bulky rack trunks and panniers.
Dating as far back as the 1970s, bicycle panniers are a traditional way of carrying gear on a bike. They are backpack-sized, easily removable bags that can be attached to the rear and front racks of your bike.
Panniers are sold in pairs and great for hauling extra clothes, camping gear, and everyday essentials on long-distance biking tours stretched over multiple days. That said, try to avoid going for oversize panniers as they will most likely affect your pedaling rotation and result in an unsafe riding experience.
If your bike camping gear can’t fit in the above options, then a bike trailer is your next best option. These one- or two-wheeled cargo trailers are usually attached to your bike’s rear axle or the seatpost.
Bike cargo trailers are lightweight to pull, easily detachable, low-profile, and streamlined, made to fit most types of bikes. If you prefer having all your bike camping stuff in one place or just don’t want to exert too much weight directly on the bike frame, then bike trailers are your perfect match.
A rather obvious method of expanding your storage options includes using the pockets on your clothes to store small items. Carrying a backpack or a daypack may also come in handy in keeping most of your bike camping gear.
Messenger bags and daypacks are perfect for carrying small- to medium-sized essentials for errand runs and short trips.
Not exactly the Tour de France but equally as exciting, probably even more, bike camping is the perfect way to enjoy the great outdoors. It’s a healthy, inexpensive, sustainable, and freeing form of exploring outdoors off the beaten paths and trails.
While it may be slightly daunting to get into at first, transitioning from a beginner to a professional level takes no time.
We hope we’ve shed enough light on this exciting form of camping and most importantly, helped you start your bike camping journey.
Charlie Leone
Website Owner/Editor
Welcome to CampingManiacs